Welcome to the "Reviews and Giveaways" Blog page.  For our educational website, please visit
                             beyondthecarseatminimums-alabama.webs.com
Beyond the Car Seat Minimums - Alabama
Reviews and Giveaways
  • Home
  • Product Reviews

Baby Trend Inertia - Join the Movement

3/5/2014

1 Comment

 
Picture

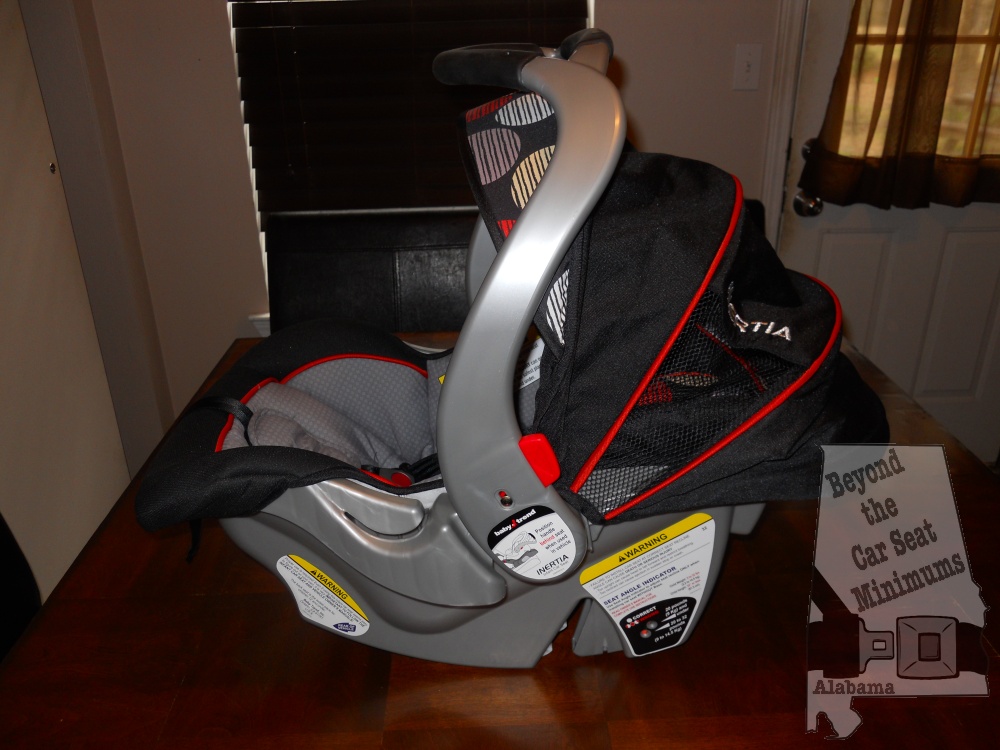
Meet the Baby Trend Inertia Infant Car Seat!

With a new baby on the way, I was very excited to have the opportunity to review the Baby Trend Inertia Infant Car Seat! This seat has some intriguing features that I was eager to test out, and hopefully fall in love with before Baby Harrison makes his debut this summer.

Specs:
Rear facing only, 5-32 lbs and up to 32 inches
8 harness height positions ranging from 8-11 inches
Base is 14 inches wide and 24 inches deep
6 year expiration from date of manufacture
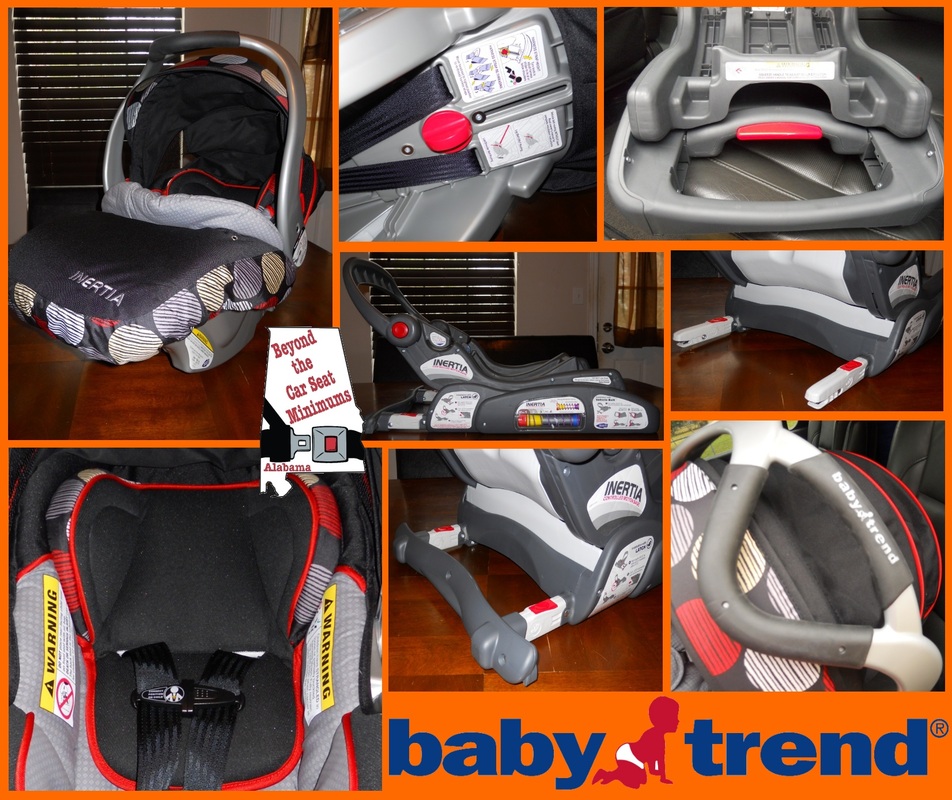
Picture
Features:

*4 recline positions*
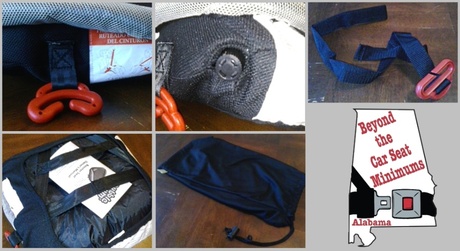
*Ergonomic "triangle" handle*
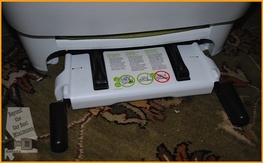
*Rigid LATCH connectors on the base*
*Removable foot muff*
*EPS energy absorbing foam in headrest*
*No-rethread harness*
*Adjustable crotch strap with puzzle buckle*
*"Brace" bar on base*
*"Inertia"controlled motion base*
Picture
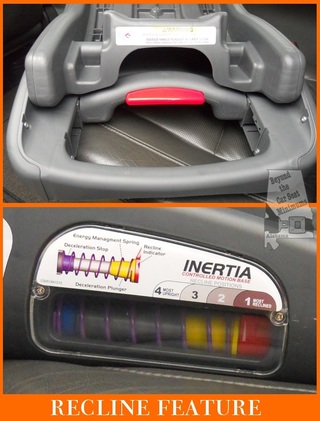
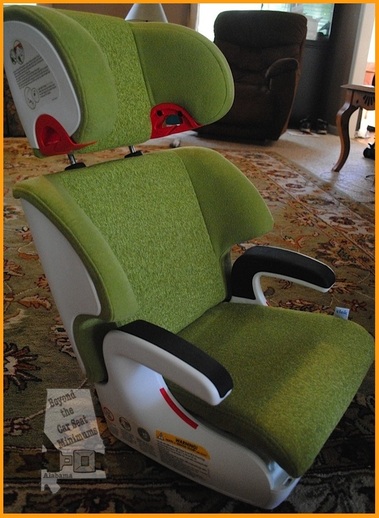
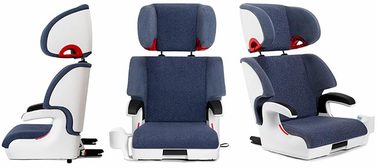
Recline: The recline options of the base make it easy to adjust the seat more upright for older infants who don't want to be fully reclined, and who no longer need the full recline option for safety.  (The #1 recline position (most reclined) is required for any baby under 3 months old.  For newborns and small infants, being too upright can cause their heads to slump forward and restrict their air flow.  As the child gets older and gains head control, head slump is not as big of a concern, because they can move their head to a different position if necessary.)  Instead of using a "recline foot" like most infant seat bases, the Inertia has a recline feature further back in the base, and it's a very clear way to see how you're adjusting the seat.

Picture


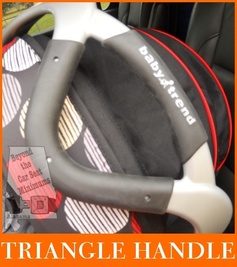
Ergonomic "Triangle" Handle:
 The triangle shaped handle is unique to Baby Trend, and is designed to make it easier to carry.

Picture
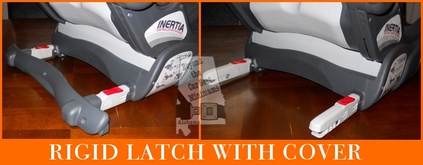
Rigid LATCH: Intended to make installation quick and easy, with less opportunity for mistakes.  A car seat can only protect your child as intended if it's installed correctly, and the Rigid LATCH does a great job of removing some of the guess work
that can make most parents feel overwhelmed.

Picture

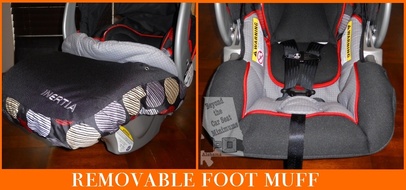
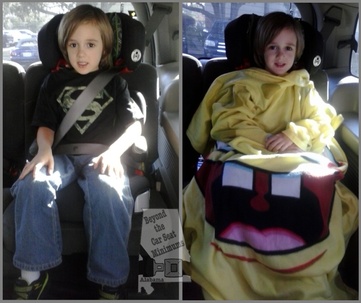
Removable Foot Muff:  Offers a little extra warmth for the baby.  Instead of being able to be kicked off like blankets, the foot muff keeps baby's legs covered.

Picture


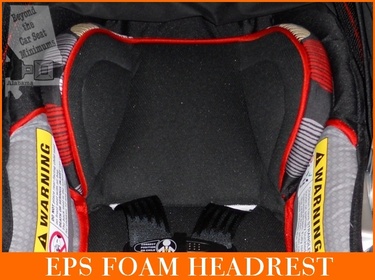
EPS Foam:
 Located in the headrest of the restraint, the EPS foam is intended to help absorb crash forces around the most delicate area of the child.

Picture
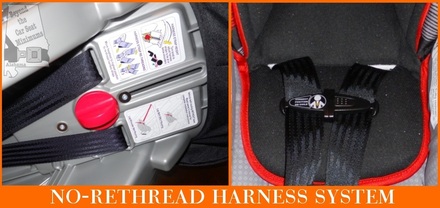
No Re-thread Harness: Makes it easy to adjust the height of the harness as the baby grows.  Instead of having to unhook the harness at the back and thread it through multiple slots on the seat, the Inertia has a turn knob on the back of the seat that can raise or lower the harness height.

Picture
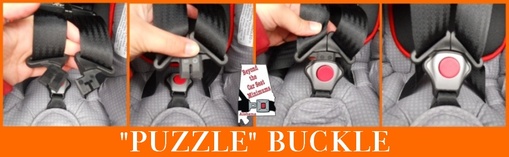
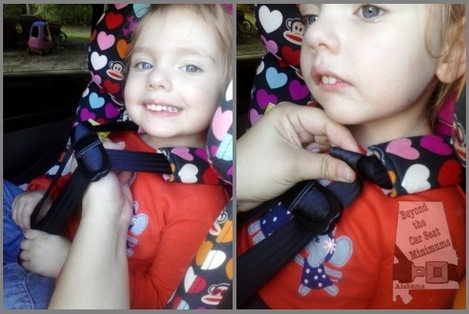
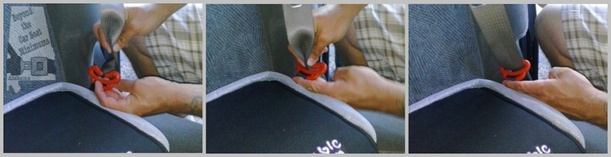
Adjustable Crotch Strap with Puzzle Buckle:
The length of the crotch strap can range from 3.5-6 inches long to accommodate a range of children.  The buckle is referred to as a "puzzle buckle."  Each side of the tongs must be placed together before inserting into the buckle, instead of being inserted individually.


Picture


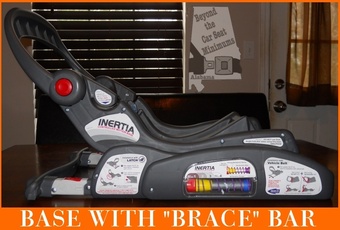
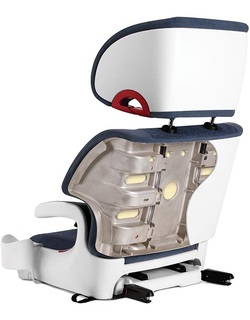
Brace:
Keeps more of the base in contact with the vehicle seat, for optimal performance of the "Inertia" motion control.

Controlled Motion Base: How did the Inertia Car Seat earn it's name?  During an accident, the internal section of the base can rotate forward, bringing the child to a more upright position, which allows for the best amount of energy dispersal.
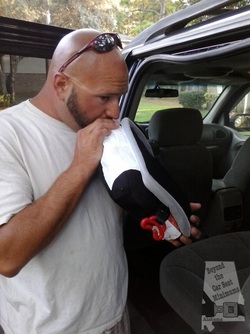
Picture
Installation
Picture
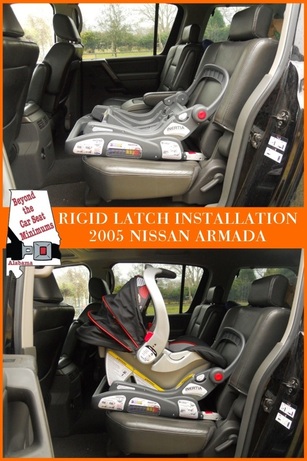
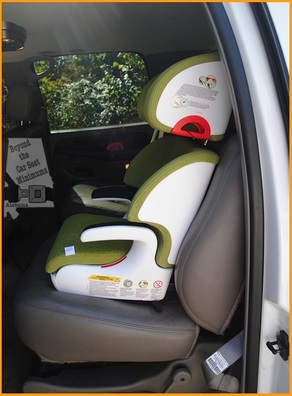
I was very excited to try out the rigid LATCH installation of the base.  Until now, I've only used Rigid LATCH on forward facing seats, so seeing it in the base for an infant seat is a nice surprise!

With this LATCH option, you just simply line up the base on the vehicle seat's lower anchors, and push on.  That's it! No tightening needed!  Just rotate the brace into position against the vehicle seat back, and the installation is complete and secure.


I found that the LATCH installation took a little extra work in vehicles that have anchors positioned deep in the seat bight.  They're a little more difficult to get the LATCH connectors to reach in one quick movement, but with a little wiggling and angling, the base still connects, and then sits properly on the seat.
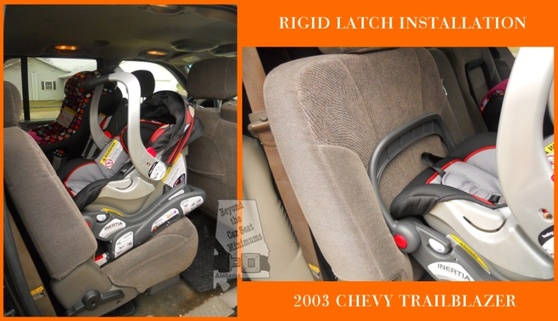
(My Chevy Trailblazer was a perfect example of a vehicle with deep anchors!)

Picture
Picture

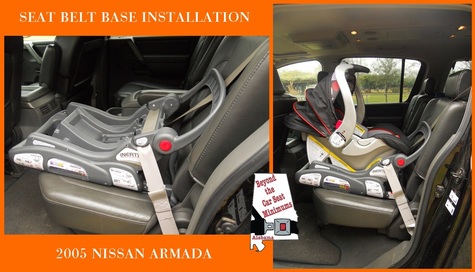
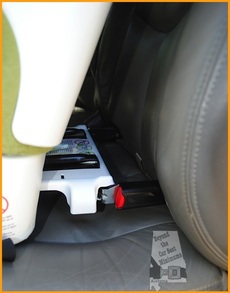
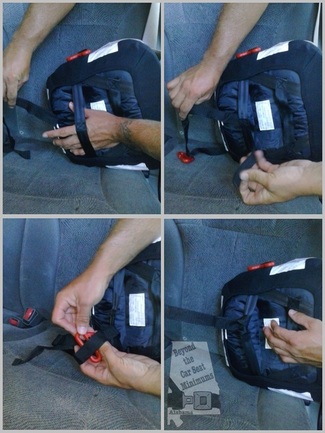
When doing a seat belt installation of the base, there are a few more steps to follow.  First, the seat belt adapter (long plastic cover) has to be on the rigid LATCH connectors.
(If you use the LATCH, make sure you don't misplace the cover!)   If you're using a lap/shoulder belt to install, the lap portion gets threaded through the two belt guides on the base, and the shoulder belt gets placed flat against the vehicle seat back, between the seat and the brace.  Then tighten and lock the seat belt, to keep it secure.

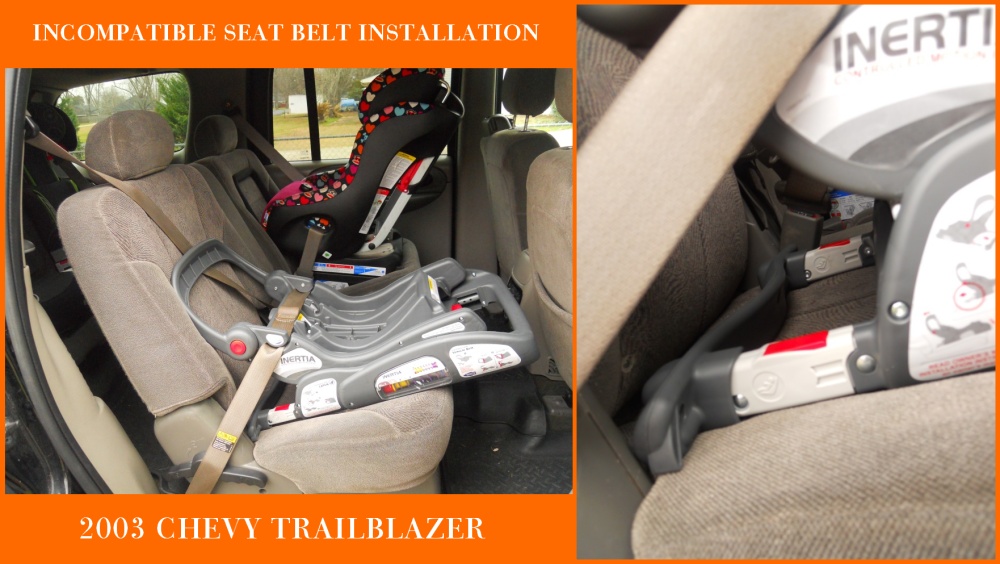
*While attempting a seat belt install in my Trailblazer, I discovered an incompatibility with this seat base and my vehicle.  On each side of the vehicle seat, I have some plastic housing for the seat belt and recline mechanisms.  With the seat belt adapter positioned properly on the LATCH bars, I can't position the seat between the plastic housing.  The adapter is too wide, and I was unable to get a secure installation.  If you have similar plastic housing on your vehicle seats and will need to do a seat belt installation of the base, test it out in your car first, to make sure it can fit in between the plastic!*

Picture
Picture


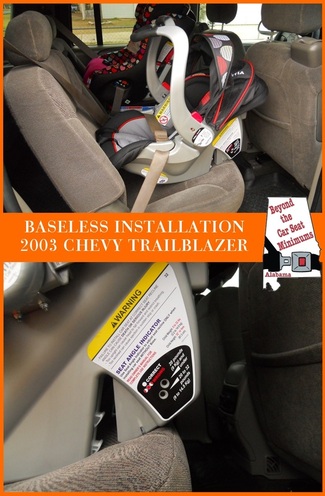
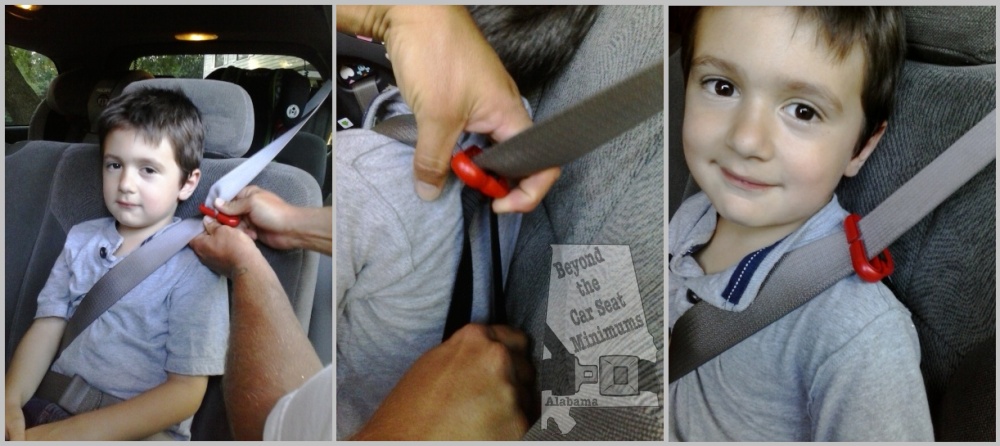
I was able to get a fabulous baseless install in the Trailblazer, though!  You can set just the infant seat in the vehicle and thread the seat belt through the belt guides by the baby's legs.  Tighten and lock the seat belt, and you're good to go!  As with any infant seat, the inconvenience of not using the base is that you have to make sure your child restraint is at the proper recline level each and every time you install it.

Picture
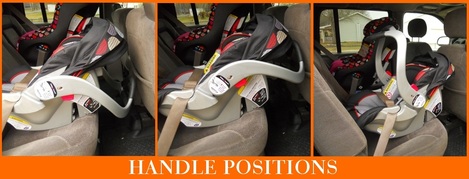
Previously, Baby Trend required that the handle of the infant seat remain in a locked position behind the seat while it was being used in the vehicle.  This made for some tight installations in smaller cars that needed a little more clearance between the front and back seats.  The company has retroactively changed this requirement for all of their seats, and the handle can be in any locked position while in the vehicle, which can open up a little more space when needed!
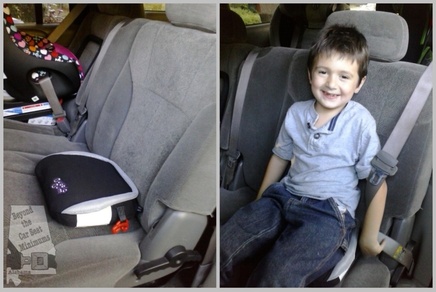

Baby's Fit

The bottom harness height of the Inertia is 8 inches from the seating area.  While some newborns will have a long enough torso to reach the bottom slot, it's not likely to fit all newborns, especially small ones, due to the safety issue of harness height.  While rear-facing, the harness straps need to be coming out of the seat *at* or *below* the child's shoulders, never from above.
(An "average" newborn will have a torso length between 7 and 8 inches)
Picture


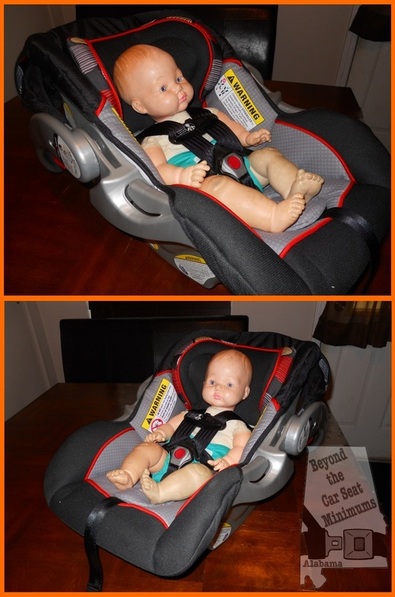
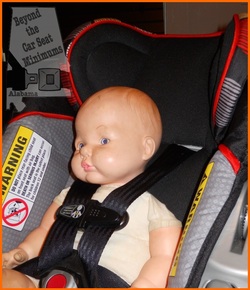
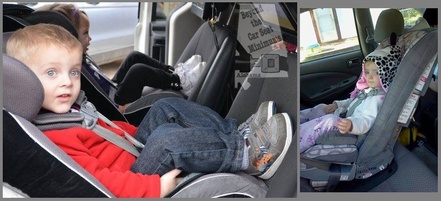
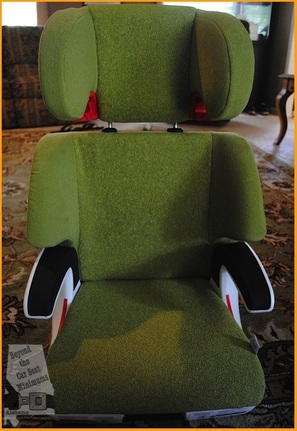
Since Baby Harrison won't be making his debut for several months, my trusty newborn doll, Indy, stepped in (er, crawled in?) to help me with the review.  Indy's torso is about 7.5 inches long, and she would proportionately weight about 8 pounds.  With a cloth diaper on, she just reached the bottom harness slot.  The harness was able to fit snugly around her, and she would be well protected.


Picture


After raising the harness to it's highest position, you can see how much growing room Indy would have!  If she grew on a proportionate growth curve, she would easily fit properly in the Inertia until her first birthday, if not longer.

Final Impressions

I think the Inertia has some fabulous features.  I'm a big fan of the rigid LATCH, even though it wasn't "super simple" in all vehicles I tested it in, it was still easier than other LATCH systems that I've used.  The Controlled Motion base is innovative and a welcome addition to the car seat market.  Having a no-rethread harness is becoming more important to parents, and makes adjustments quick and easy.

The puzzle buckle for the crotch strap has a little bit of a learning curve, and is not a fun feature for everyone.  (Particularly, those with extra wiggly babies!)  The slightly high bottom harness height has the potential to improperly fit a decent selection of newborns, though larger babies can expect a good fit.

Overall, I think the Inertia can be a great choice for many families.

Want one of your own?  Check it out here at Amazon!
1 Comment

Baby, it's COLD Outside!

12/9/2013

19 Comments

 
It's that time of the year!  Time to light the fires, pull out the thick quilts, and curl up on the couch to sip your hot chocolate!

Most people also think it's time to bundle up the kids and loosen the car seat straps to accommodate their winter clothing.  Unfortunately, this is not safe!
We're here to look at the dangers of winter wear in car seats, and all the SAFE alternatives that parents can do!  There's even a toasty-warm giveaway!

What are the Dangers?

Picture


Most parents believe that as long as they adjust the tightness of the harness straps, their child is safe wearing a thick coat in their restraint.


Here we see Johannah wearing a close fitting, thick coat in her car seat.  The straps are tightened enough to pass the Pinch Test, and by those standards, are safe and secure.

PicturePassing the "Pinch Test" with the coat on

During an accident, crash forces are put on the harness and child.  These forces continue to compress the coat, more than any parent can replicate beforehand.  Therefore, the straps react as if the coat isn't there at all, and the harness is completely loose on the child.
(Imagine the coat in a space-saver bag.  A parent can put the coat in the bag and remove a lot of the bulk with just their hands.  It's not until you use the vacuum hose, that you can see the difference in compression, just like the compression that will take place during an accident.)

Picture
If we remove Johannah's coat without adjusting the harness straps at all, we can see how loose her straps really were.  This is how they would react in an accident, which could lead to ejection and/or serious injury.

This compression can happen with coats, snowsuits, and bundle bags.  The rule of thumb is to not use any extra "fluff or puff" in your seat that goes behind the child, or in between the child and harness other than their regular fitting clothing.

What do the Car Seat Manufacturers Say?

Look in your child restraint manual.  Somewhere in the warnings section, you'll probably find a note about bulky clothing.  Here's the warning that is in the
Evenflo Maestro Car Seat Manual.
Picture

How Do I Know if my Child's Coat is Safe for Use in Their Seat?

The easiest way to know if a coat or snowsuit is safe for car seat use is to test it out just like we did with Johannah.  Put the child in their seat with their coat on, and adjust it securely.  Unbuckle the harness WITHOUT loosening the straps, and re-buckle without the coat on.  If the harness is still snug and passes the Pinch Test, then that coat is safe to wear in the seat.  If the harness is too loose, skip that coat.  (An alternative test is to buckle the child without the coat on, and without adjusting the harness at all, try to re-buckle it with the coat on.  If you can still buckle it, you're good to go!  If it's too tight and unable to buckle with the coat underneath, that coat is a no-go.)

ALTERNATIVES

There are a lot of ways to keep your children warm AND safe in their seats!  Here are some of our favorites!
Picture
Flip it Around!

One of the quickest and easiest solutions is to turn the child's coat around backwards once they are buckled in their seat!  If your child is older, like the boy in this picture provided by the Super Car Seat Geek, it's easy for them to learn to take their coat off when they get to the car, get buckled, and then allow you to help them put
the coat on again.  You don't have to worry
about taking anything extra with you, and
their coat is right there when they're
ready to hop out of the car.

Picture


Blankets


No, really- just blankets!  So many people ignore this easy option!  It's especially convenient if you're still using an infant car seat.  You can buckle the baby securely, and then tuck in the warmth with blankets before you even step outside the house.

Picture
Infant Seat Covers

If you're worried that your little bundle will kick off their bundle of blankets, there are a few safe options of covers for your infant carriers.  The key is to find one that only goes over the TOP of the carrier, and not a bundle bag that goes behind the baby as well.  Something like a Cozy Cover is what we refer to as a "shower cap style" cover.  The elastic edge pops over the outside of the seat quickly, and doesn't interfere with the harness.  It's easy to tuck blankets around the baby first, and know that they won't get kicked off.

Picture
There are also some infant covers that
attach to the handle of the car seat and drape down like a blanket.  These are great for blocking the wind while going to and from the car on those really blustery days!
(Please note that this little baby was just modeling for us, and the child would need to be securely buckled before heading out to the vehicle!)

Picture
Snuggies!

To me, the only thing more annoying than SpongeBob is listening to Snuggie commercials.  BUT, that doesn't mean I knock the SpongeBob Snuggie sitting in my backseat!
Snuggies are great for bigger kids who want their hands free, while keeping the rest of them warm!

And, YES! The no-coat rule should be followed by kids in boosters, and adults in just seat belts!  To properly restrain you, the seat belt needs to sit snugly against your body.  If you add extra "fluff and puff" that needs to compress first, your body will move a lot more before the seat belt can stop you!

Picture
Fleece!

Fleece is a fabulous little material that is super thin while still being super warm!  Most kids can wear a single layer fleece coat over their clothes without having to adjust the tightness of the harness on their seats.  Combining it with mittens, hats, and any additional blankets makes for a toasty warm ride!  It's also warm enough that it's easy to wear when walking to-and-from the car without getting cold.

Picture


Car Seat Poncho


Since fleece is so warm, it makes fabulous ponchos!  It's easy to buckle the child securely and have the poncho drape around them like a big cozy blanket!  If you're feeling the least bit crafty, there are many tutorials online for making your own poncho.  This no-sew version was created by one of our CPST Admins, and it has instructions for making it with or without a hood!


A perk of having the poncho is that it's easy to wear to and from the car, and set the child in the seat without having to take it off.  Just move some of the fabric to the side while you buckle the harness, and then lay it flat!  The back of the poncho goes up the back of the car seat, so there's no fabric between the child and the seat.

Picture


I think that it's pretty obvious that Johannah loves her fleece poncho.

Do you think your child would love one, too?!

Enter our giveaway below for your chance to win a custom sized poncho for your little monster!


Picture


The winner of this giveaway will receive a custom sized two layer fleece poncho made from this monster fleece!

GIVEAWAY IS NOW CLOSED!
THANK YOU FOR YOUR ENTRIES!

a Rafflecopter giveaway
19 Comments

Clek Oobr Giveaway Winner!

10/15/2013

0 Comments

 
Picture


Congratulations to Jamie Schaff-- the winner of our Clek Oobr Booster Seat Giveaway!


We appreciate all our followers who entered the giveaway, and we hope you'll join us for the next one, too!

0 Comments

With a Clek Clek here, and a Clek Clek there...

10/7/2013

40 Comments


Meet the Oobr!

Picture
Admin Jennifer had the pleasure of gaining first hand experience
with the Clek Oobr Booster Seat and she's thrilled to share her thoughts
with you!  Let's read what Jennifer has to say about the Oobr,
and see if it could be the right booster for your child!
Picture
I don't think I've ever been so excited to see the UPS man. He giggled at my squeal when I saw that the box he carried bore the words 'Clek' and 'Oobr' on the side.

"Been waiting on this, have you?” he asked with a smile.

"YES!” was my over-exuberant reply.

Any true car seat nerd knows the joy I've just described. To open that box and touch that brand spanking new seat is something akin to a cool breeze on a hot summer day. It's almost like an adventure into uncharted territory. For me personally, this will probably be the last car seat I'm ever going to need. Not just because the seat has a crazy long life span, but mostly because my 'baby' is six years old. Oh sure, we'll still use it for another three to four years, but it's just somehow… different. She's a bigger kid, and she may not even need the back on the seat for too much longer. Anyway, I digress…


Picture
Upon opening the box, I was a little relieved to see that not much assembly was required. The back and headrest were already put together, so I only had to attach the back to the seat's base, but not without first reading the manual! The back connectors are solid metal, not typical flimsy plastic pieces. The manual asks that you face the base away from you, and then start from your right by placing the metal piece down into its groove. Then you simply lower the other side into its groove and listen for a very audible click. There's no denying that it's securely fastened where it needs to be. Then, you simply press on the seat portion where the child sits, and listen for two smaller clicks to fasten the cushion to the base. If you're going to opt to install the cup holder, aka the 'drink thingy™', you simply detach the seating pad and slide it into place, then reattach the seating pad. (Bonus: the 'drink thingy™' is completely dishwater safe!) It was a very simple procedure to remove and reattach the seat pad.


Picture


This is a very nice, very well designed seat. It's not as boxy as I imagined it to be. The lines are clean, and there's a very modern look to the seat, with or without the back. The seat is rather heavy for a booster seat, though. In high back mode, it weighs in at 20 pounds, sans cup holder. 


Picture
You might notice the cover of the Oobr looks a little different than what you've see on most car seats and boosters. The fabric all over the seat is called Crypton® fabric. Crypton® is a special fabric treated with antimicrobial and flourochemical agents. These act to prevent the growth of bacteria, mold, viruses, etc. as well as helping resist stains. The cover on the seat pad is fully removable for washing when necessary. Washing instructions are inside the seat cover. Keep in mind that ONLY the cover is washable and NOT the foam pad itself. As for the back and the headrest… well, you have to spot clean those parts as the cover is not removable, but it should still be easy-peasy to clean because of the Crypton® fabric. If you do encounter a spill or stain, the manual advises you to scrape away what you can (if the spot is dry). You can mist on a mild detergent, but it doesn't specifically say which kind.
(As techs, we usually recommend very mild dish soap like Dove or Ivory. I would personally
use a watered down solution of one of those soaps in this case.)


Installing the seat

Picture


The seat has built in Rigid LATCH. Not too common on a booster seat, but a very welcome addition to the booster seat arena. (As an aside, if your booster seat doesn't have LATCH, make sure to buckle the seat into the car even if it has no passenger. A loose seat can become a projectile in a crash.)

Picture
The Rigid LATCH system slides out of the back of the seat, almost as if it was designed for the Jetsons. ;-) Once you read how it's done though, it's super easy. You grasp the recline adjuster on the front of the seat and pull the Rigid LATCH connectors out of the back of the seat. They're on sort of a sliding plate with the LATCH connectors at the end. Then, you just line everything up and push the Rigid LATCH connectors onto the LATCH system in your vehicle. The LATCH system in my 2003 Yukon XL is very visible and easy to access. The seat went right into place and you could hear those telltale clicks. Once you're sure you're attached, you repeat the same process you did to access the system, except in reverse. Pull out on the recline adjuster again and give the seat a push toward the back of the seat. Once you hear the sliding plate lock into place, you're ready to roll!


Picture

A side note about the LATCH system on this seat: the typical LATCH weight limits do not apply. You can use it for the full weight range of the seat, as it is not bearing a load like a convertible, combination, or infant seat does.
The LATCH is there just to keep the seat in place so you don't have to buckle it in when it's not occupied.

PictureThe Oobr in the most upright, and the most reclined positions
Another nice perk of the Oobr is the recline feature. You can achieve up to a 12 degree recline, so long as you maintain contact with the headrest. Just pull the recline adjuster and slide the seat forward to achieve the desired recline angle.

I also installed the seat in my husband's 2004 Chevy Impala. It took a little more oomph and wiggling, and that was just because the LATCH system in that car is not very easy to access. If you don't feel like you can securely attach both lower anchors, then it is just as safe to use the seat belt only. Clek's only stipulation is that the headrest on the seat must make contact with a headrest in the vehicle,
and the vehicle's seat cannot be reclined.

Picture


At six years old, Emma tested out the Oobr in high back mode.

She is 45lbs and 47 inches tall, and it provided a beautiful belt fit!

Picture


While Patrick seems less enthusiastic about having his

picture taken than his sister did, he still achieved a safe seat belt fit when he tried the Oobr
in backless mode.


He is nine years old, weighs 67lbs and is 56 inches tall.

Overall Thoughts

Picture
PROS:
  • Easy to assemble
  • Adjustable headrest extension with steel bars (It adjusts just like your vehicle’s headrests!)
  • Removable seat back when you're ready to go backless
  • Removable, dishwasher-safe cup holder 'drink thingy™'
  • Crypton® Super Fabric resists stains and is easy to spot clean
  • Reclining seat back with up to 12 degrees of recline
  • Side impact head protection (when used as a high back booster)
  • Easy to install; narrow for fitting 3 across
  • Rigid LATCH system
  • Magnesium frame in the backrest, surrounded by energy absorbing foam
  • 9 year lifespan
  • 100% recyclable through Clek's recycle program

Picture

CONS:
  • Quite heavy for a booster, weighing in at 20 pounds in high back mode  (Weighs 10lbs in backless mode)
  • At almost $300 for the solid colors, and about $30 more for the adorable Paul Frank patterns, it could be cost-prohibitive for someone on a tight budget
  • Not a "grab and go" seat when moving between cars in high back mode
  • Seating area may not be deep enough for kids with long legs
  • Backrest cover cannot be removed

Picture
SPECIFICATIONS:
  • Oobr's box is 18 1/4" x 13 1/4" x 27"
  • Seating pad is 13 1/2" wide at the front (where the knees bend), 11" wide at the back end, and 12" deep (front to back).  The 'drink thingy™' adds 6 inches to the width when in use.
  • Backrest is 22 1/2" tall with the headrest all the way down and 29 1/2" with the headrest fully extended
  • Space between backrest and headrest, with the headrest fully extended, is 7"

Child Requirements:

Alabama law requires a child to be 5 years old or 40lbs to use a belt positioning booster seat.

Oobr Specifications In High Back Mode:
33-100 pounds
38-57 inches tall
Ages 4 and up

Oobr Specifications in Backless Mode:
40-100 pounds
40-57 inches tall
Ages 4 and up
Overall, I give the Oobr an A-. In my book, it lost just a few points because of the weight of the seat and because it isn't going to be quite as
cost effective as other seats. Other than that, it's a gorgeous seat with
a clean, modern look and great features.


Picture

Are you intrigued by the Oobr?

How about a chance to win one for FREE,
in your choice of color, directly from Clek?!
Enter our giveaway with the widget below!  You can earn extra entries with "likes" on Facebook, or for "following" on Twitter!  Then leave us a comment on the blog to let us know what color you're hoping to win!  Drift, Blue Moon, Snowberry, or Dragonfly!
(Note: The 'drink thingy™' is not included with the Drift model, but can be purchased separately.)
Picture
a Rafflecopter giveaway
Note: Claiming entries falsely will result in being disqualified.  (Example: Do not
earn an entry claiming to "Follow" us on Twitter if you do not.)  We will confirm
any claimed entry before announcing a winner.  Discovery of these false
claims will forfeit your valid entries.
Winners of previous giveaways hosted by "Beyond the Car Seat Minimums - Alabama"
are excluded from entering new giveaways for 6 months.
40 Comments

Congratulations, Becky!

9/10/2013

0 Comments

 
Picture
Congratulations to Becky for winning a Bubble Bum Booster Seat!

Thank you to everyone who entered and shared our page with family and friends!  Be on the lookout for our next review and giveaway!
0 Comments

Bubble Bum Booster Seat - Review and Giveaway!

9/2/2013

12 Comments

 
Picture

Meet the
Bubble Bum!


What is the Bubble Bum?
The Bubble Bum is a portable, inflatable, foldable backless booster seat!

Who is it for?
The limits for the Bubble Bum Booster Seat are 40-100lbs, and 40-57 inches tall.
The manufacturer recommends it for the approximate ages of 4-11 years old.  As always, the child should be mature enough to use a booster properly
before being allowed to use the Bubble Bum.

Where can I find it?
The Bubble Bum is available in stores at select Target locations, and can be found online at www.bubblebum.co/us

Is it safe?
Yes!  The Bubble Bum passes all federal safety standards as required by
the National Highway Traffic Safety Administration.  (FMVSS213)

What if it pops?
The Bubble Bum is made of a durable and thick material that should not puncture
or pop.  (Think of a heavy duty life raft, rather than inflatable arm floaties...)
Still imagining some type of perfect-storm-worse-case-scenario accident where the seat pops?  Rest assured, the Bubble Bum also passes testing in it's deflated state.

What's it like to use?
Here's the fun part!  Join us as we test out the Bubble Bum!
Picture
What's in
the box?

The Bubble Bum package is complete with one Bubble Bum Booster Seat, a stretchy
carrying bag, instruction manual, shoulder belt positioning clip,
and a FREE mobile games app!

Picture

We tried out the black and silver model of
the Bubble Bum, but it's also available
in purple with lime green trim!

Picture
Components of the
Bubble Bum

The seat has two red metal belt guides on the sides of the seat.  These are for the lap portion of the seat belt, to keep it low on the child's hips and away from their soft tummy area.  There is one air valve on the back of the seat for inflation.  The removable shoulder belt positioner will need to be used if the vehicle's shoulder belt does not lay properly on the center of the child's shoulder.  Finally, there are elastic straps on the bottom of the booster, to store your manual for easy access.  The booster folds up and can be carried in the stretchy carry bag.


Using the Bubble Bum

Note: This review is not intended as a replacement to the Bubble Bum Booster Seat instructions manual.  Always read your manual before using any child restraint!
Picture


Step One-  Inflate the booster.  Open the air valve by twisting to the left.  Blow into the
valve until the seat feels full and you
can't inflate any further by mouth.

*ONLY use your mouth to inflate; NEVER use a compressor, pump, or other mechanism.* 

Quickly twist the valve to the right to close.

Picture


Step Two- Place the booster on the vehicle seat, and position
the child on the
Bubble Bum.

Picture
Step Three- Thread the lap belt portion of the seat belt through BOTH of the red belt guides, making sure that the belt isn't twisted, and buckle the seat belt.  An easy way to thread the belt is to pinch it in half horizontally,  place it in the gap of the red guide, and release the pinch allowing each side to lay flat within the guide.

Picture


Check for proper seat belt placement- the lap belt should
be low on the child's hips, touching the thighs.  It should
not be on the soft tummy area.

Picture


Step Four- If the seat belt is not centered on the child's shoulder, the additional shoulder
belt guide is needed.

Picture


Attach the strap to the bottom of the Bubble Bum, by looping it through the strap farthest to the back of the seat and pulling it tight.


Bring the clip up the child's back and thread the shoulder belt into the guide.  Tighten the strap to ensure proper placement.

Picture

Our Thoughts

Pros:
*The Bubble Bum is only 13 inches wide, which makes it a great option for fitting into small spaces.
*Being able to deflate and fold the seat into a bag makes it easy to send with your child.  (Great for after school carpooling, visits with grandparents, sleepovers with friends, etc.)  It's easy enough to inflate that the child can do it himself!
*Provides proper belt fit on a wide range of children.
*Durable- easy to wipe clean, and will stand up to the "wear and tear" of use.
*Budget friendly- at only $39.99, the Bubble Bum cushions more than your child's bum, it cushions your wallet, too!

Cons:
*A younger child will probably still need help unbuckling themselves- the red lap belt guides are not easy for little hands to maneuver. 
*Shorter lifespan-- the Bubble Bum expires 4 years after the date of purchase.  That's still a good amount of time to last for one child, but it won't last long for passing down to younger siblings as they grow.
Now for the really important opinions...
What do the kids think?!
*All kids tested out the Bubble Bum in the 2nd row driver side seat of a 2003 Chevy Trail Blazer*
Picture


Thomas
6 years old
47 inches tall
50 pounds

"I think it's cool.  I like that it doesn't have a back, but has a clip for the shoulder belt. It's comfortable!"


Picture


Michael

5 years old
45 inches tall
47 pounds

"It's not hard like my other booster.  It's fun to sit on!  I need Mommy's help to unbuckle.  I can't get the seat belt out of the red piece by myself.  I could get it in, though."

Picture

Maggie
6 years old
48 inches tall
54 pounds

"It's neat!  It's soft and fun to sit on.  I think the seat belt fits me like it's supposed to, to be safe.
I couldn't undo the seat belt by myself, though, I needed help getting it out of the clip.  I wish I had a purple one!"

Picture

Ben
10 years old
55 inches tall
100 pounds

"It doesn't look like a normal booster seat; it was cool to see it folded in a bag!  It's soft, and nice to sit on.  I'd like to use it a lot.  I can buckle and unbuckle myself in it, and I didn't need help with the red guides."


So are you interested in the Bubble Bum?  Want to get one for FREE?!
Enter our giveaway below, and you can have the chance to
receive a Bubble Bum Booster Seat straight from the manufacturer
in your choice of black or purple!
GIVEAWAY CLOSED!
Thank you for your entries!
Congratulations to our winner, Becky!

While we appreciate our followers all over the country, our giveaways are currently only available to Alabama residents.
You must have a valid Alabama address to enter.
a Rafflecopter giveaway
For more Child Passenger Safety information, check out our educational website
beyondthecarseatminimums-alabama.webs.com
12 Comments

    Our Promise

    We strive to provide accurate and unbiased reviews of the products provided to us. Beyond the Car Seat Minimums - Alabama will never accept any payment from a company in exchange for a review.

    Previous Reviews

    March 2014
    December 2013
    October 2013
    September 2013

    Categories

    All
    Baby Trend
    Boosters
    Bubble Bum
    Clek
    Infant Seats
    Winter Safety

    RSS Feed


Powered by Create your own unique website with customizable templates.